Introduction
A Connected App within Salesforce ensures that you can set up an authorized connection in a secure way to send data back and forth. This connection is established through oAuth .
Follow the steps below to add the Connected App to SalesForce.
It can take an average of 10 minutes for settings to be processed in Salesforce. In the meantime, copy the Consumer Key and Consumer Secret from the newly created App. We will soon set this up at CampaignSuite.
Findock uses Webhooks. To make your website accessible within Salesforce, the URL of your website must be added to the Remote Site Settings . To do this, follow the steps below:
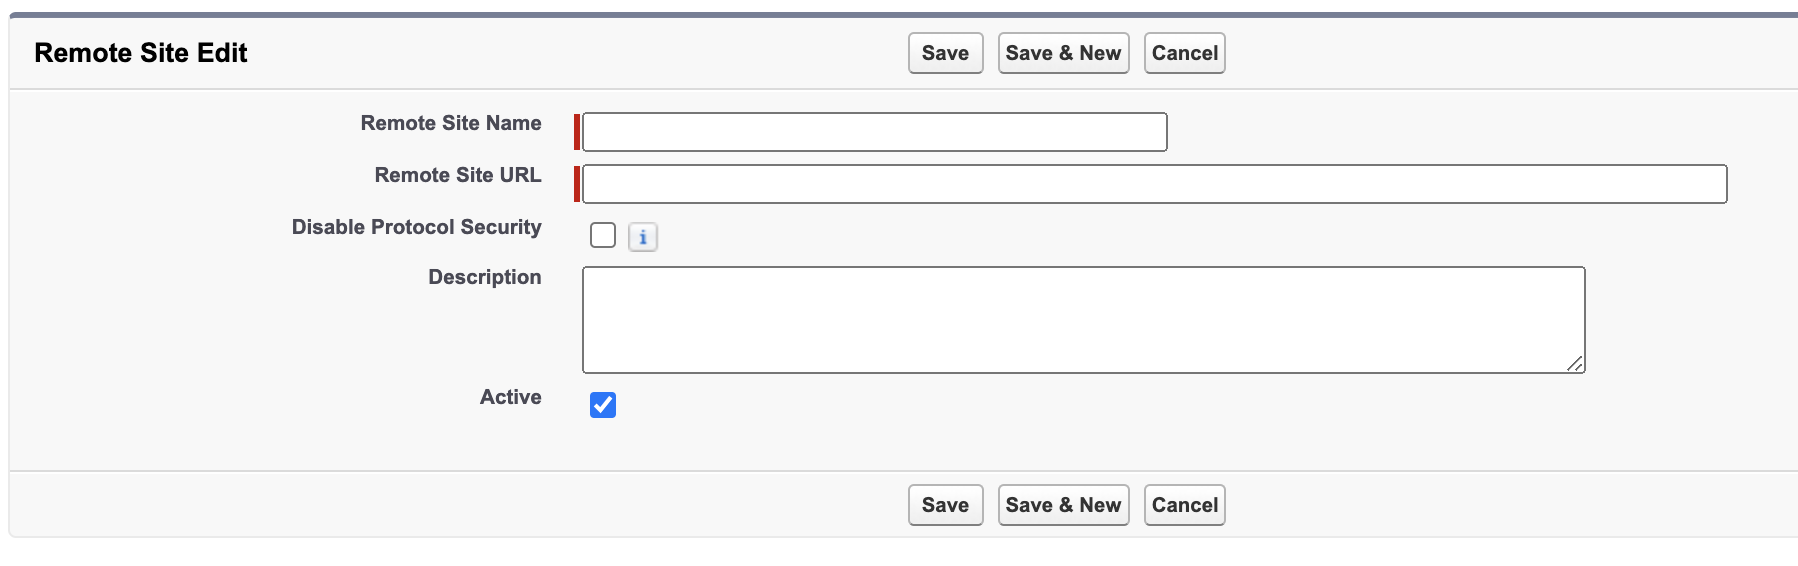
Your website has now been added as a secure website to be accessed by, for example, Findock.
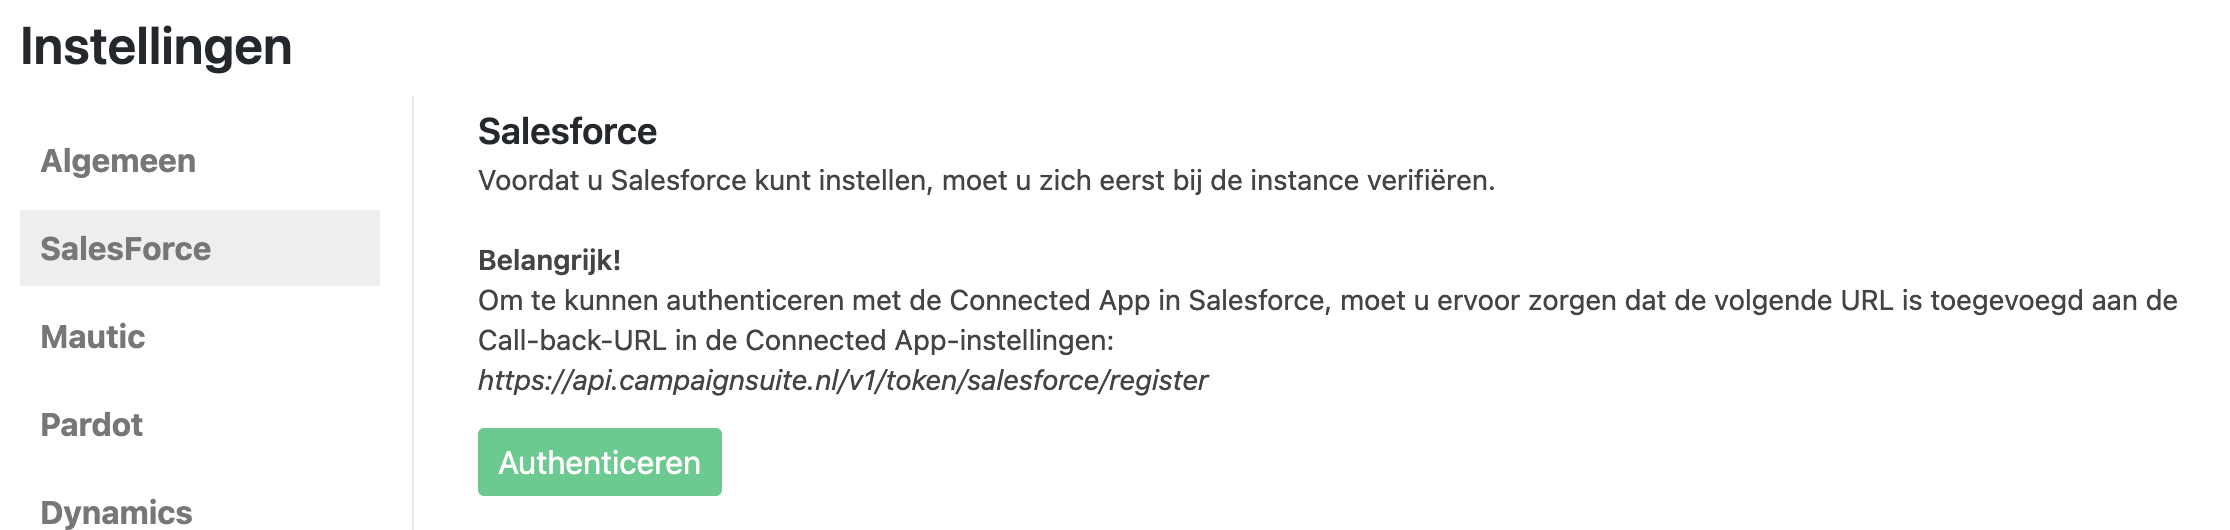
Once the Connected App has been created, you can link it to CampaignSuite. Go through the following steps to do this:
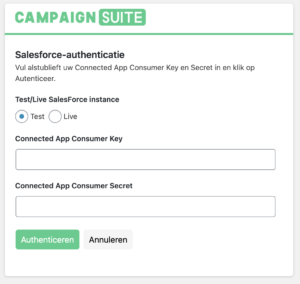
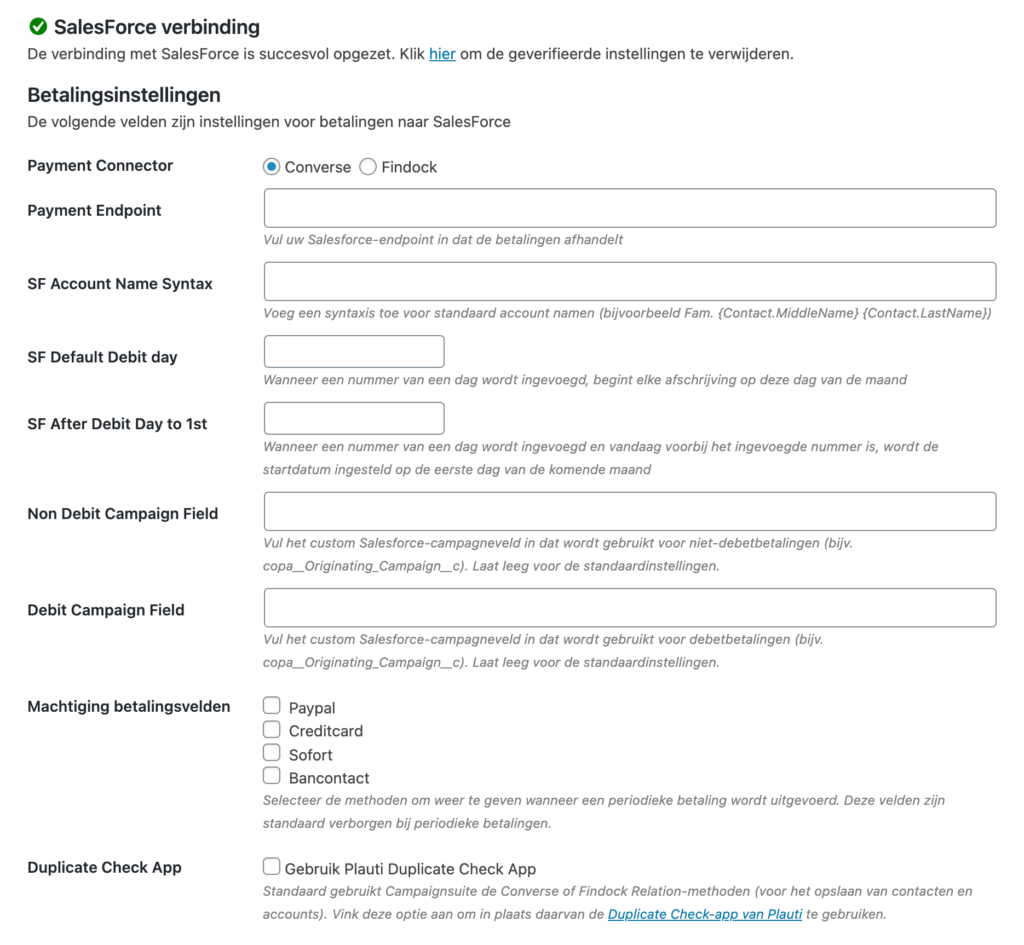
When you return the connection is established and you can click on Close window. The page will then be refreshed automatically and the Salesforce settings will be shown.

Once the Connected App has been created, you can link it to CampaignSuite. Go through the following steps to do this:

When you return the connection is established and you can click on Close window. The page will then be refreshed automatically and the Pardot settings will be displayed.
Currently there are no additional settings available for the Pardot connection.
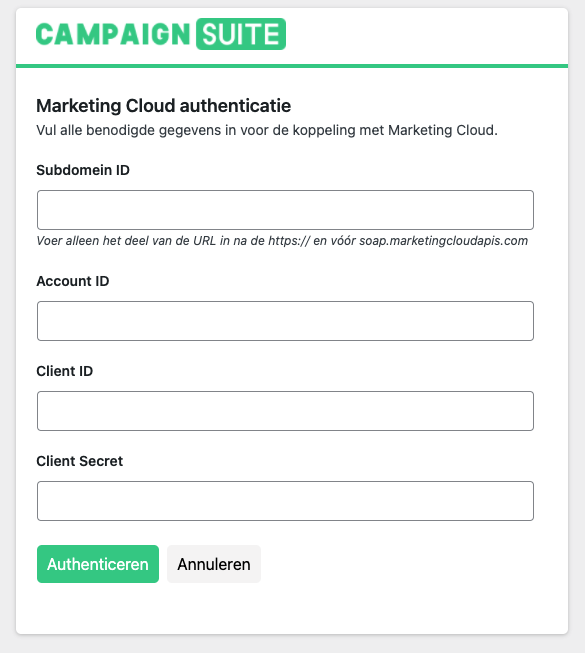
The connection to Marketing Cloud is established through a OAuth 2 connection. Follow the steps below to set this up: